
After building docker images in the previous article, we will talk now about docker volumes: We will firstly define them. After that we will specify when and why we need them. Then we will take few examples to implement them and learn how to use them. you will find yourself able to persist your data with docker volumes
What are Docker Volumes?
To understand docker Volumes, we need first to study the way docker deal with data:
When you start a container where there is data treating (like a database server for example), this data will remain inside the container because docker containers have their own isolated environment. So once that container is removed, all the data within it will be removed too. This can be really serious in the case of containers that contain sensitive data. So to solve this issue, docker volumes were invented to persist data from the containers.
So Docker Volumes is…
It’s a concept which allows us to persist or conserve data and share them between different containers. They are foreign objects out of the host’s File System which can be mounted with either read-only or read-write permissions.
Docker volume’s importance can be remarked mostly in stateful containers such as databases, logging apps and containers that holds secrets or keys…
In the other hand, there is no real utility for persisting data for stateless containers ( such as frontend apps ) unless for a custom need. So even if we do it in this course, it will be for testing purpose only.
There are mainly 3 types of volumes in docker:
- Host volume: lives on the Docker host’s filesystem and can be accessed from within the container. The user specifies its path.
- Anonymous volume: useful for when you would rather have Docker handle where the files are stored. It can be difficult, however, to refer to the same volume over time when it is an anonymous volumes.
- Named volume: similar to an anonymous volume. Docker manages where on disk the volume is created, but you give it a volume name.
Docker volumes can be created through different ways: it can be defined in the Dockerfile, or from the CLI while using the command “docker run”. It can also be created separately then called through its name for “Named volumes”.
So let’s take some examples to understand it more.
Volumes from Dockerfile
Let’s first will try to define a volume through Dockerfile:
FROM nginx
VOLUME /usr/share/nginx/html
EXPOSE 80
CMD ["nginx", "-g", "daemon off;"]
In this example, Docker will mount the path “/usr/share/nginx/html” in a volume that it will create automatically and for this case it’s an “Anonymous Volume”.
So let’s build and run this example:
$ docker build -t nginx-vol1 .
$ docker run -d --name nginx-v1 -p 80:80 nginx-vol1
Inspect the container with the command inspect:
$ docker inspect nginx-v1
We can find the volume where our container is mounting to:

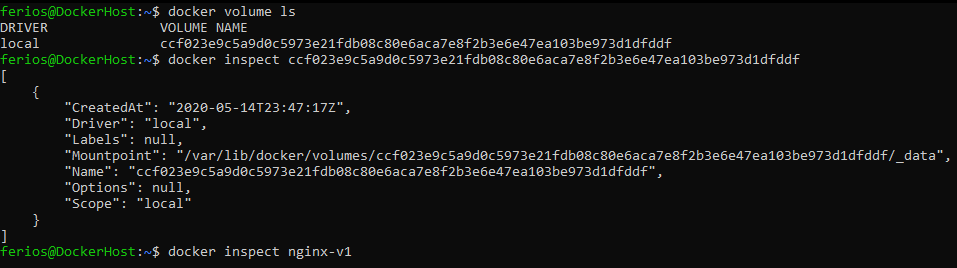
Or we can simply list all the volumes and inspect them to find a whole description about them with:
$ docker volume ls
$ docker inspect <Volume-Name>
Or we can simply list all the volumes and inspect them to find a whole description about them with:
Check the content of that volume:

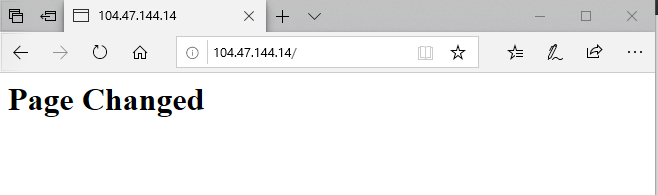
Change the content of the index.html, from a root user, execute this command:
# echo "<h1> Page Changed" > <PATH_TO_VOLUME>/index.html

If we check the browser, Nginx default page must be changed:
However,
Docker has mounted the volume of Nginx to a volume that it created automatically. But once that container is deleted and we run another, a new volume will be created but the old volume will remain unless we decide to remove it manually. So the idea now: what if we mount the directory to a volume that we choose? We will get to this when we reach the “Host Volumes”.
Volumes from CLI
There are actually two ways to create volumes from the CLI: as a flag while creating a container and creating them separately then calling it while creating a container through their name.
For the same previous example, we will run Nginx while specifying our volume as a flag.
First of all, create a folder called “nginx-content”, then in it create an “index.html” file and add whatever you want in it.
$ mkdir nginx-content && echo "<h1> Nginx From Volume </h1>" > nginx-content/index.html
Now let’s run a container that mounts on that folder:
$ docker run -d --name nginx-v2 -v ~/nginx-content:/usr/share/nginx/html:rw \
-p 82:80  nginx
Check the browser if the page was loaded successfully:
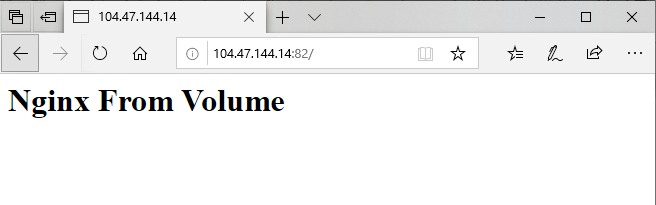
If we start another container with the same volume specification, we can notice that it will show the same page on the browser the fact both of them share the same volume.
This is actually a “Host Volume” that will share the path “~/nginx-content” from the host machine with docker where the binding can be defined to manage the access rights to keep both of your container and host machine secured.
If you have any problem with permission while changing the content of the container it’s just because you don’t own it as a user. Just change the ownership of the folder to your own user with: sudo chown -R $USER:$USER ~/nginx-content/
But remember that we are doing just for testing, it’s not recommended to mess with ownership and permissions in a prod environment.
The -v flag
The flag -v or –volume takes two parameters and the third is optional: it works in the following schema:
-v <source-path>:<destination-path>:<access- Mode>
- Source-path contains the files that will be mounted. In our case the source code to run on Nginx.
- Destination-Path the path where the Source-path will be mounted on. in our case the default directory of Nginx.
- Access-Mode defines the operations that can be performed while mounting. It can be:
- Read Only: “ro”
- Read Write: “rw”
- If no access mode is specified, docker will take “rw” as a default mode.
- If we specify only one path as an argument, docker will consider it as Source-path and mount it to an “Anonymous Volume”.
- Source-path can be a named volume also, you just replace the path with the volume’s name. we will learn how to create volumes in the next section of this course.
The –mount flag
Docker has another command that allows to create volumes while launching a container which is “–mount”: mount is similar to “–volume”, yet it has more options: the major difference is that the “–volume” syntax combines all the options together in one field, while the “–mount” syntax separates them.
Before passing to mounting, let’s first figure out how to create a named volume, because we will be needing them later.
To create a named volume we will be using the following schema:
$ docker volume create [OPTIONS] <VOLUME_NAME>
Options can be:
- –driver or -d: to specify volume driver name: the default value is “local”.
- –label: to set metadata for a volume.
- –opt or -o: to set driver specific options.
You can find the whole list for the driver plugins supported by docker here.
But for now, we will be using the default local plugin because other plugins require installation.
Let’s create a simple volume:
$ docker volume create myvolume
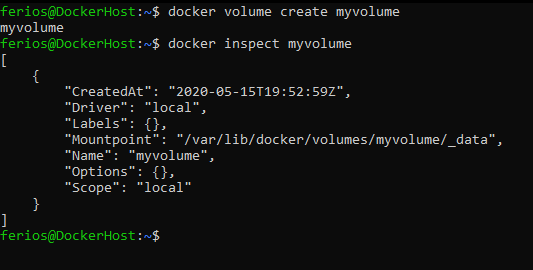
Now let’s create a more specified volume:
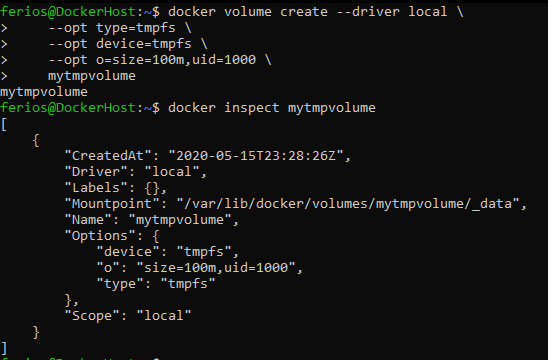
$ docker volume create --driver local \
    --opt type=tmpfs \
    --opt device=tmpfs \
    --opt o=size=100m,uid=1000 \
    mytmpvolume
This will create a volume named “mytmpvolume” of type tmpfs (Temporary File System) with the size 100 Megabytes and the uid 100:
It’s even possible to add a volume on a different host through NFS server:
$ docker volume create --driver local \
    --opt type=nfs \
    --opt o=addr=<NFS-SERVER-IP>,rw \
    --opt device=:/path/to/dir \
    mynfsvolume
Once the volume is created, it can be mounted while launching a container:
$  docker run -d \
  --name mounted-nginx \
  --mount source=myvolume,target=/usr/share/nginx/html \
  nginx:latest
If we inspect the volume “myvolume”, we can verify the mount from there:

You’ve surely noticed that a “Named Volume” has a random path just like an “Anonymous Volume”.
But,
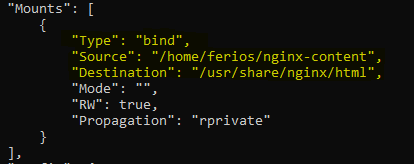
we can also use a “Host Volume” with “–mount”: For that mount have a type “bind” that allows us to bind the volume to an existing path to containers. We can check that through this example:
$  docker run -d \
  -it \
  --name binded-nginx \
  --mount type=bind,source="$HOME"/nginx-content,target=/usr/share/nginx/html \
  nginx:latest
Note that paths in docker should be absolute.
Now let’s inspect the container to check if the binding was successful:
You can now use all the types of volumes in docker. Based on these simple examples, you can customise that docker’s volume mechanism on all your containerized apps where you need to persist your data with docker volumes.
You only need to:
- Decide which paths from the container you need to persist.
- Choose the mechanism which with you’re going to create your volume ( Dockerfile, -v, –mount)
- Pick up the type of the volume that you want to use ( host, anonymous, named).
- Choose the mounting path if needed. ( For host volumes)
- Adjust access rights ( ro, rw)
Then launch your container! Don’t forget to check the process, errors always happen and it’s easy and useful to “inspect” them. You cannot persist your data with a faulty docker volume or container!
Short Recap
Here is a commands’ recap that can help you to manage “Named Volumes”:
$  docker volume create          # Create a volume
$  docker volume inspect         # Display information on a volume
$  docker volume ls              # List volumes
$  docker volume prune           # Remove all unused local volumes
$  docker volume rm              # Remove one or more volumes
Once you remove a container, its associated volume will remain. If you want to remove the container’s volume while removing the container just use the following flag:
$ docker rm -v <container[name|id]
Through this course, we have walked through the different types of docker volumes: we have learnt how to use each one of them, how to manage them and treat them to persist our data. But we will for sure discover more about volumes in the next tutorial when we dig more and more into docker.