
You’ve learned in the previous course how to get started with docker by running basic commands on docker hub public images. And now, you will learn how to Build your own Docker Image through Dockerfile: you will discover what Dockerfile is, what it’s composed of and how to use it properly.
What is a Dockerfile?
Docker image building is defined through special text files called Dockerfile where you need to define all the steps explicitly: In other words, a Dockerfile is a text file that Docker can read from top to bottom and contains a bunch of instructions which informs Docker of HOW the Docker image should get built.
What is Dockerfile composed of?
It’s better to discover the components of a Dockerfile through examples and we will specify each component when it encounters us.
Project setup
We will take as an example a simple NodeJS server application:
Create a new folder called “node-app” for example, and inside it create the following files:
package.json
{
  "name": "my_node_app",
  "version": "1.0.0",
  "description": "Node.js on Docker",
  "author": "John Doe john@kubernetestutorials.com",
  "main": "server.js",
  "scripts": {
    "start": "node server.js"
  },
  "dependencies": {
    "express": "^4.16.1"
  }
}
server.js:
const express = require('express');
// Constantsconst
PORT = 3000;
const HOST = '0.0.0.0';
// App
const app = express();
app.get('/', (req, res) => {
    res.send('Hello World');});
app.listen(PORT, HOST);console.log(`Running on http://${HOST}:${PORT}`);
Creating Dockerfile
Now we will create the Dockerfile to dockerize this app: let’s create the Dockerfile instructions step by step:
Create an empty file called Dockerfile. Note that that file has no extension:
$ touch Dockerfile
The first thing to do is to specify the image which we are going to use from Docker hub using the “FROM” instruction : in our example we are going to use the LTS (Long Term Support) version of node which is 12.16.3 at time this course is created:
FROM node:lts
We will next specify the default working directory that will hold our application inside the image using the “WORKDIR” instruction:
 # Create app directory
 WORKDIR /usr/src/app
The next step is to install the apps dependencies: once that this images comes with “node” and “npm” preinstalled, we will need to copy the “package.json” file and the “package-lock.json” files into the image. For that we will use the instruction “COPY” that will copy these files to the app directory that was defined in the previous step:
 # A wildcard is used to ensure both package.json AND package-lock.json  are copied
COPY package*.json ./
Now we will run “npm install” to install the dependencies specified in the “package.json” file: to run shell commands inside the image, we will use the “RUN” instruction:
 RUN npm install
 # If you are building your code for production
 # RUN npm ci --only=production
Now everything is ready, we will copy the source code of our app inside the image. To do so we will use the instruction “COPY”.
So, in our Dockerfile we will add:
COPY . .
This simply tells docker to copy all the files existing in the current directory which is “node-app” (only server.js remained) to the app directory defined in the second step.
The next step is to expose the ports that our app binds to: images are isolated environment so we will define the allowed ports manually to prevent any undesired connection to it.
To do so we will use the instruction “EXPOSE” to lead our used port which is “3000” to the “outside” of our docker image:
EXPOSE 3000
An app can have more than a port to expose, you just need to add other “EXPOSE” instructions.
Last but not least, we will define the command to run our app using “CMD” instruction which defines our runtime: this means the command that will be executed once a container of our image is started. In this example we will run the file “server.js” through “node” command to start our server:
CMD [ "node", "server.js" ]
Our Dockerfile should now look like this:
FROM node:lts

# Create app directory
WORKDIR /usr/src/app

# Install app dependencies
# A wildcard is used to ensure both package.json AND package-lock.json are copied
COPY package*.json ./
RUN npm install

# If you are building your code for production
# RUN npm ci --only=production

# Copy the app source files
COPY . .

EXPOSE 3000
CMD ["node", "server.js"]
Note that “#” is used to insert comments to a Dockerfile: commented lines won’t be considered while building the image:
Now it’s the time to build our first docker image using the command build through this Schema:
$ docker build [OPTIONS] PATH | URL
- You can use PATH when you’re building an image for an app that you have in your host machine.
- You can use URL when you want to build an image that’s hosted somewhere else, like in GitHub for example.
For now, we will run a basic docker image using minimum options and specify the path argument:
$ docker build -t my-node-server .
Through this command, we tell docker to build the image and tag it with the name “my-node-app” with the flag “-t” and use the Dockerfile existing in the current directory with the dot argument “.”
If you are in a different directory, you should change the dot with the Dockerfile’s location.
Building Image
Now let’s build our image:
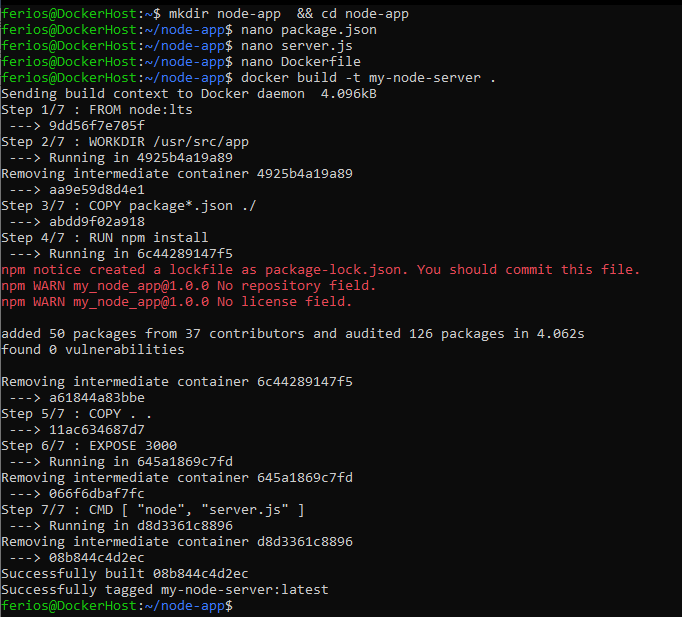
Our image was built successfully, and we can find it in the images list:

Now let’s run our image:
$ docker run -d --name node-web-app -p 3000:3000 my-node-server
We can also check the container’s logs:

As the logs says, the app is running without errors on the port 3000. Let’s check it in the browser:
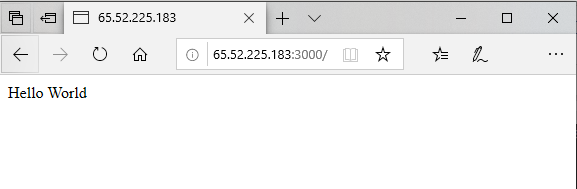
And here we have successfully built our first Nodejs docker image.
We have only used basic Dockerfile instruction. Now, we will specify other important ones:
- ADD: like COPY, ADD lets you copy files from a specific location into a Docker image with a little difference:
- COPY takes in a src and destination. It only lets you copy in a local file or directory from your host.
- However, ADD lets you do that too, but it also supports 2 other sources. First, you can use a URL instead of a local file / directory. Secondly, you can extract a tar file from the source directly into the destination.
- ENTRYPOINT: replaces CMD when you want to define a container with a specific executable.
To make it clearer for you as the difference between RUN, CMD and ENTRYPOINT may be confusing:
- RUN executes command(s) while constructing the docker image. For example: it is often used for installing software packages.
- CMD sets default command and/or parameters, which can be overwritten from command line when docker container runs.
- ENTRYPOINT configures a container that will run as an executable.
- ENV: used to specify Environment variables with “key=value” format For example: “ENV stage=production” to define the building stage in a Nodejs application.
- apk mixed with RUN: Since that official docker images are light-weighted and may not have all your needs, apk can be used to install packages. It works only on alpine images. You can replace it with “apt-get” or “yum” to install packages in “Debian” or “CentoOS” based images while building with the schema:
RUN apk add --no-cache <package_name>
- VOLUME: The VOLUME instruction creates a mount point with the specified name and marks it as volumes to host machine or other containers.
Let’s build a more complicated docker image!
Now that you’ve understood the basic of Dockerfile, let’s try something else more complicated and try to build another docker image: imagine that you’re developing an angular or react app, and you want to dockerize it into a Ngnix image for production deployment. To do so, we will create a Dockerfile that will contain two stages: one for building the react app, and another to deploy it into Nginx image:
# Stage 1: Installing React and creating an application:
# Using node image and tagging it as “build”
# So we can recover its output in the next stage
FROM node:lts as build

# Create app directory
WORKDIR /usr/src/app

# Install React if you don’t have it in your machine,
# If you do have it, just launch a new app, and COPY source code
# No need for this step
RUN npm install -g create-react-app

# Creating a new React app
RUN create-react-app myapp

# Changing the WORKDIR to the new app directory
WORKDIR /usr/src/app/myapp

# Build the app
RUN yarn build
################################################################
# Stage 2: Copying the building Stage output to the Nginx Image:
# The alpine tag means the lightest stable image.
FROM nginx:alpine

# Copy the app source files, and specify the image “build” as the source:
COPY --from=build /usr/src/app/myapp/build /usr/share/nginx/html

# Expose Nginx port and launch its service:
EXPOSE 80
CMD ["nginx", "-g", "daemon off;"]
We will now build the image:
$ docker build -t react-image .
Once the process completes successfully, we can check images to find our image there:
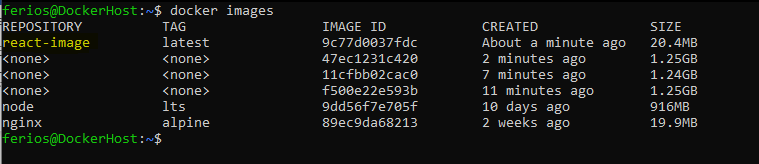
We can notice some weird images with no names and tags: docker cached the build processes and the intermediary containers in these images to boost dockerizing time for future uses. It’s safe to remove them if you won’t have to rebuild that image again but it will take as long as the first time if you remove them.
Now let’s run our image and check if it’s working correctly:
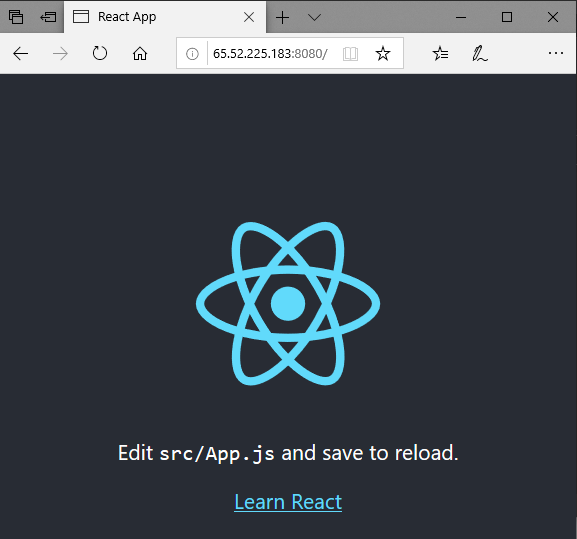
$ docker run -d --name my-react-app -p 8080:80 react-image
And here is react default page running successfully in the browser:
Now that our docker image is ready and runs successfully, we want to save it in a repository so we can share it with our team. For that we will push it to docker hub repository.
Saving Docker Images in a registry
First of all, you need to create a docker hub account from here: https://hub.docker.com/
Once you’ve done that, free public and one only private repository will available on your account.
Now we will change the image’s name to append our account id to it, for that we will tag it in the following form:
$ docker tag <local_image>:<tag> <account_id>/<image_name>:<tag>
For our example, it will be like this:
$ docker tag react-image:latest firasdotcom/my-react-image:test
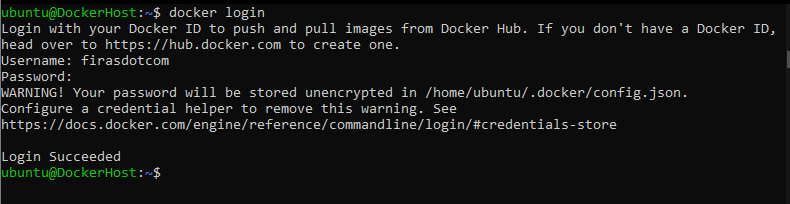
To be able to push your image to your registry, you need to login to docker hub from your CLI:
$ docker login
Now we are ready to push the image to the registry:
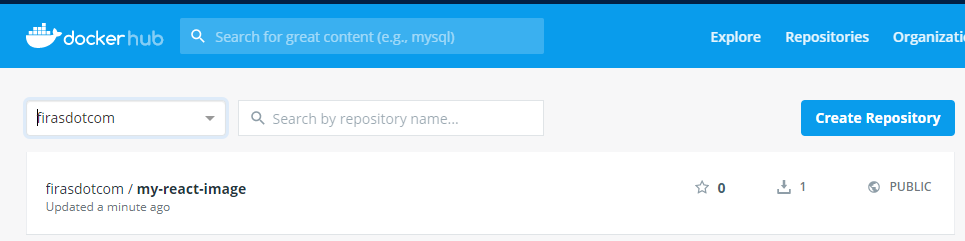
$ docker push firasdotcom/my-react-image:test

You can check your docker hub account to find the image there:
Now let’s try to pull back the image. Since the image is public, authentication is not required:
$ docker pull firasdotcom/my-react-image:test

And now you can pull the image from any docker host.
Through this course, we’ve learned how to build custom docker images through Dockerfile: we’ve used Dockerfile instructions to build a simple basic image then we tried them on a more complex image with multiple stages. The we have pushed that image to docker hub registry.
In the coming courses, we will dig deeper into docker. And we will discover docker volume and network objects.