
In the previous tutorials, we have installed Kubernetes on different Linux distributions. We introduced YAML files that allowed us to create different resources. In this tutorial we will install the Kubernetes Dashboard, and present few uses of it.
Before you start,
make sure that you have a functional Kubernetes cluster. If you didn’t initiate your cluster yet, you can check how to do it on Ubuntu or Centos.
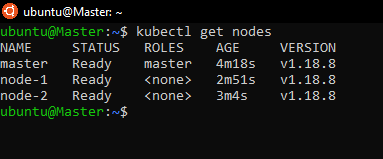
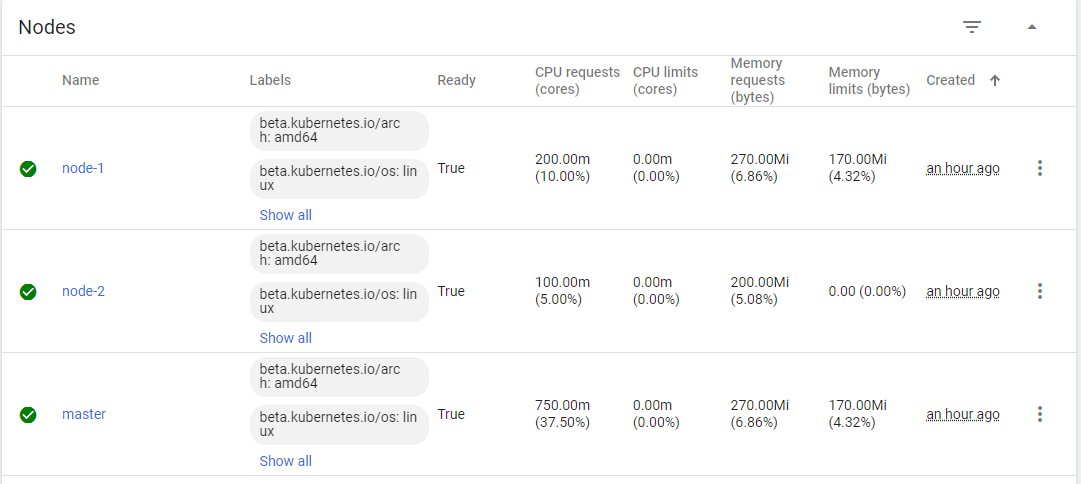
In my case, I will be using a Kubernetes cluster hosted on AWS machines with 1 master and 2 worker nodes:
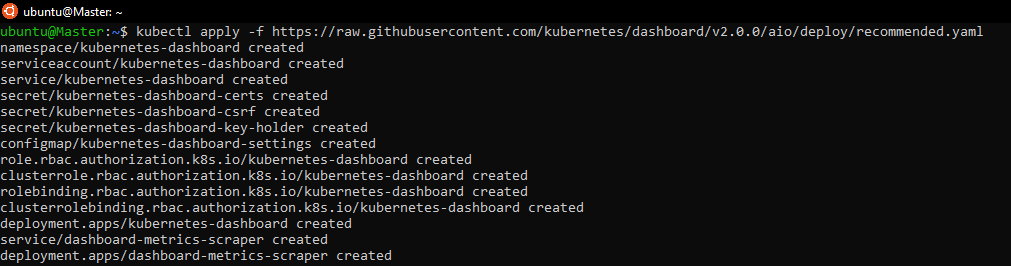
To install the Kubernetes Dashboard, you can simply apply the official installation file through the following command:
kubectl apply -f https://raw.githubusercontent.com/kubernetes/dashboard/v2.0.0/aio/deploy/recommended.yaml
we shall have the following output:
Now, we will check if the resources were created successfully and if the pods are running in the dashboard new namespace:
kubectl get pods -n kubernetes-dashboard

Now we need to create a service account that we will be using to access the dashboard: our account will be an admin account so it can view, modify and create new resources through the dashboard. We can do so by adding the roles through a clusterRole.
To create the service account, just create a new file:
nano dashboard-admin.yaml
then paste the following content in it:
apiVersion: v1
kind: ServiceAccount
metadata:
  name: admin-user
  namespace: kubernetes-dashboard

---
apiVersion: rbac.authorization.k8s.io/v1
kind: ClusterRoleBinding
metadata:
  name: admin-user
roleRef:
  apiGroup: rbac.authorization.k8s.io
  kind: ClusterRole
  name: cluster-admin
subjects:
- kind: ServiceAccount
  name: admin-user
  namespace: kubernetes-dashboard
After saving the file, we will apply it through this command:
kubectl apply -f dashboard-admin.yaml

To be able to connect to the dashboard, we need to find the token generated by the service account.
To get the token, simply use the following command: this command extracts the secret object associated to the account as JSON format, it will take the token and decode it using base64 to get the desired token:
kubectl get secret -n kubernetes-dashboard $(kubectl get serviceaccount admin-user -n kubernetes-dashboard -o jsonpath="{.secrets[0].name}") -o jsonpath="{.data.token}" | base64 --decode
The token should be similar to this:
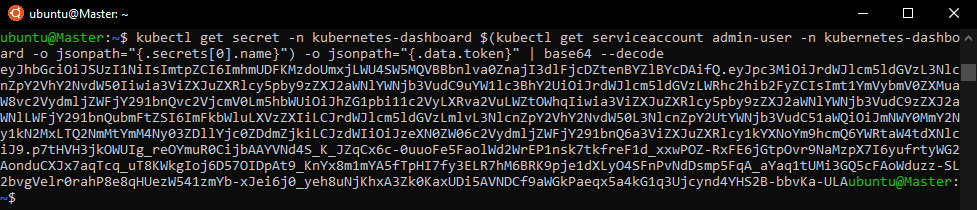
So you should save that token because we will need it later.
Accessing the dashboard
One thing to know about the Kubernetes Dashboard is that it can only be accessed using localhost address on the machine it runs on. That’s why we need to have an SSH tunnel to the server.
To do so, you can create an SSH tunnel using this command. Just replace the <user> and <master_public_IP> with your Kubernetes master IP and the user you are using to access it.
ssh -L localhost:8001:127.0.0.1:8001 <user>@<master_public_IP>
In my case, i used this command to create my SSH Tunnel:

To launch the Dashboard, use this command:
kubectl proxy

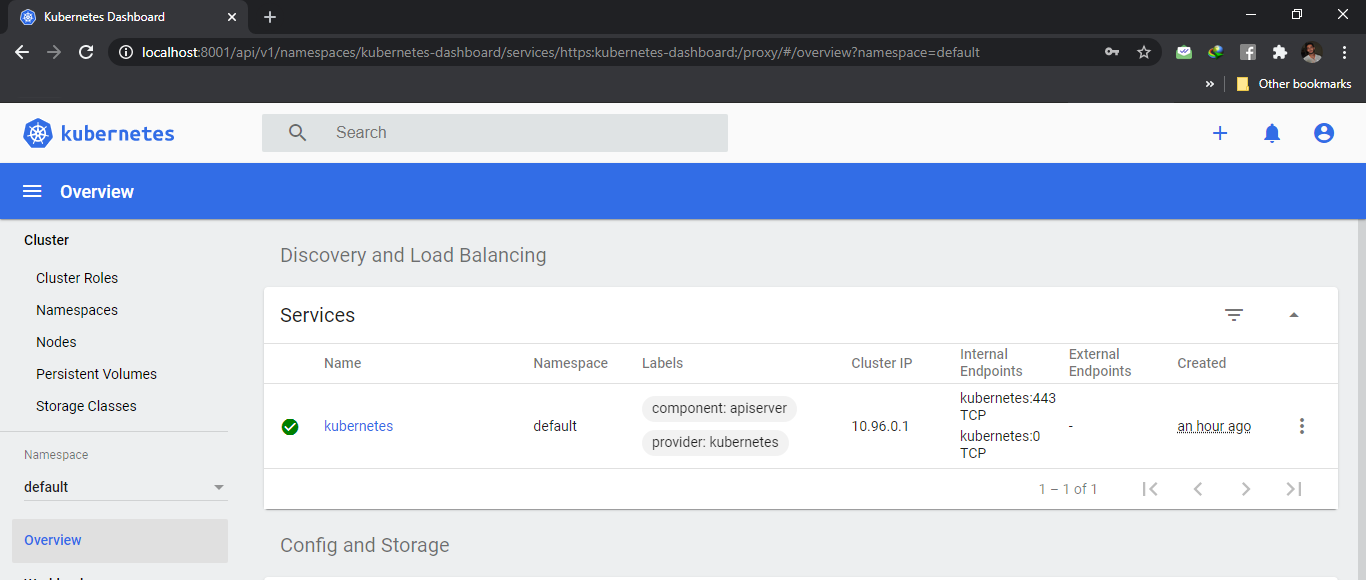
Now you can use this URL to access your Dashboard Web UI:
http://localhost:8001/api/v1/namespaces/kubernetes-dashboard/services/https:kubernetes-dashboard:/proxy/
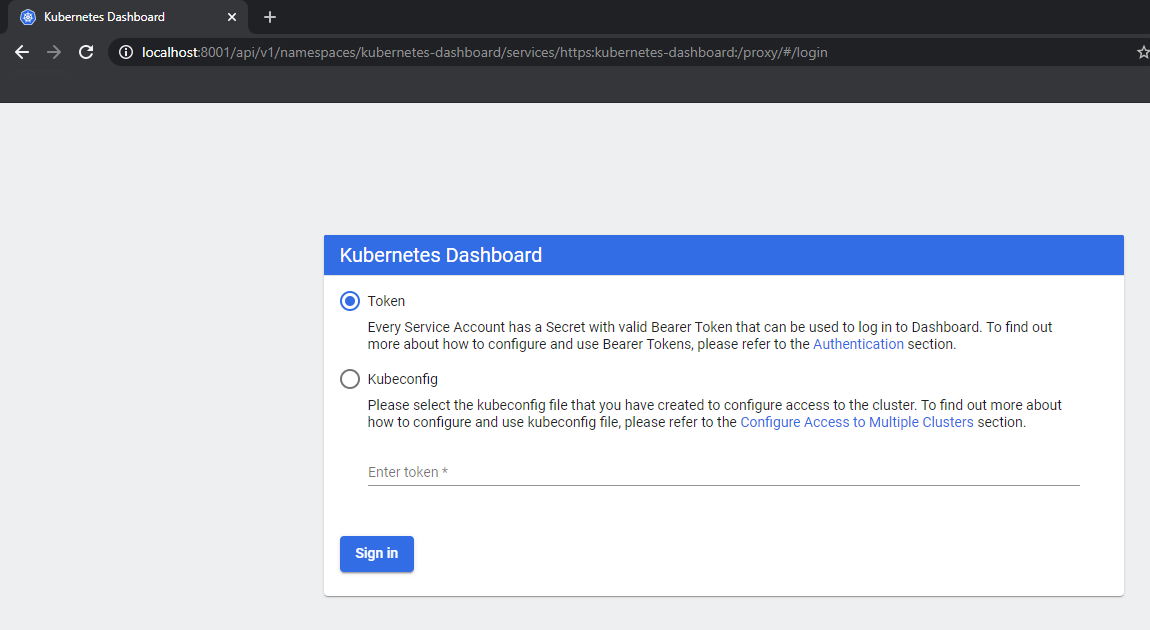
The following page will show up, you can use the token that we have saved in the previous step to sign in:
Using the Kubernetes Dashboard
Through the dashboard, you can check the different types of Kubernetes resources:
The dashboard makes it actually easier to create resources: so instead of writing a complex YAML files, you can deploy your apps by simply filling a form.
We will take as an example the deployment of a basic web application:
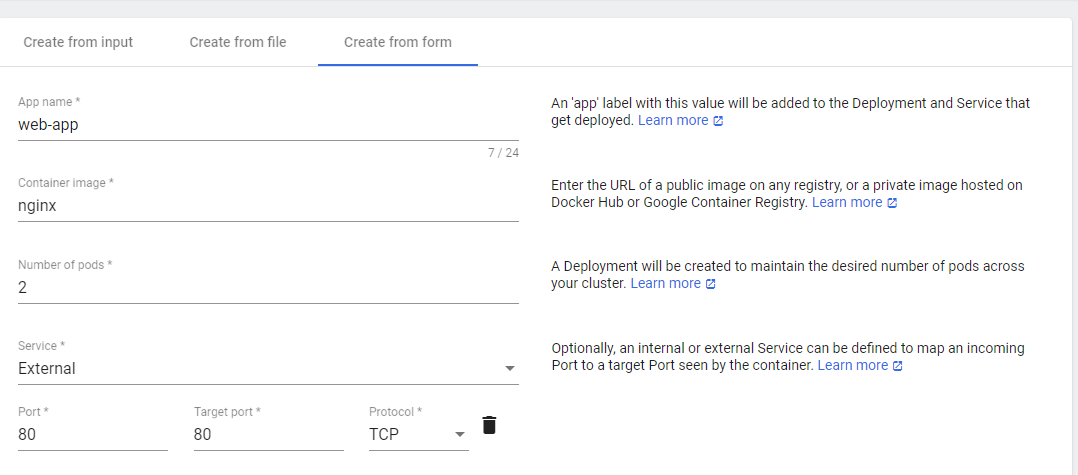
In the first section, we have specified the app’s name, the docker image that we will use. We also mentioned the number of the pods to create. And then we added an external service, its port and its protocol
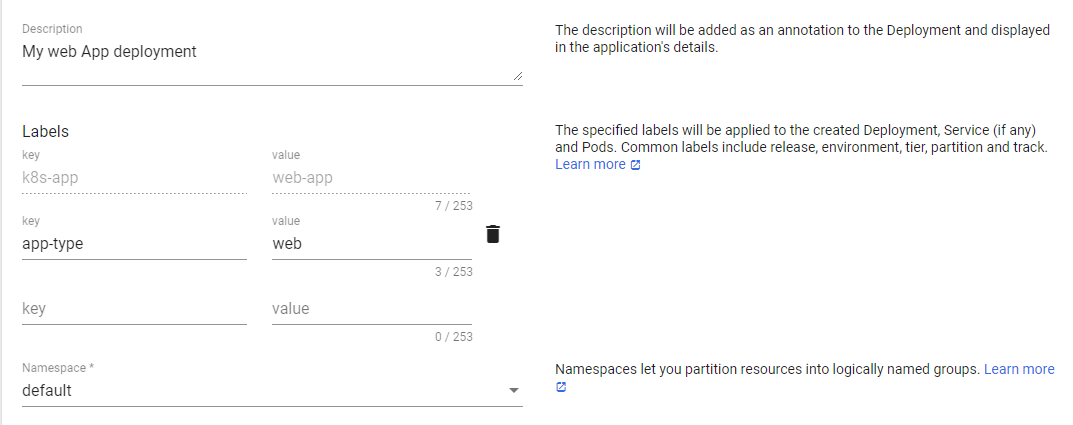
After that we added a little description. The labels here are important to link the created pods to their deployment.
We have also mentioned on which namespace our app will be deployed.
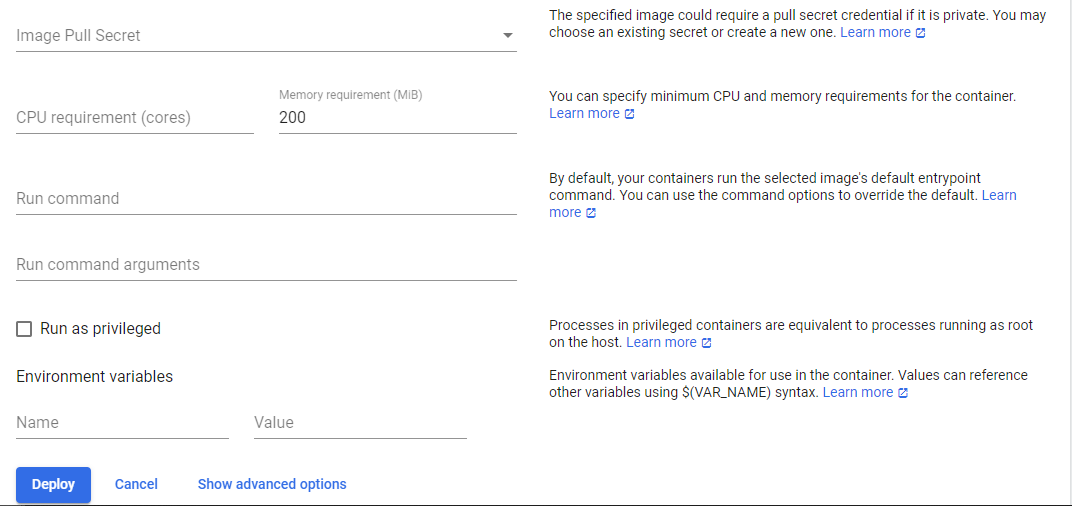
If you are trying to deploy an image from a private registry, you will need to specify the image pull secret which contains the credentials to login to the registry.
You can also set minimum resources requirement s which Kubernetes should reserve to each pod of your application.
If you have any commands you would like to run when your pods start, you can specify them in this form. You can also run them as privileged.
And if you have environment variables, you can define them with their values. Then our app is ready to be deployed.
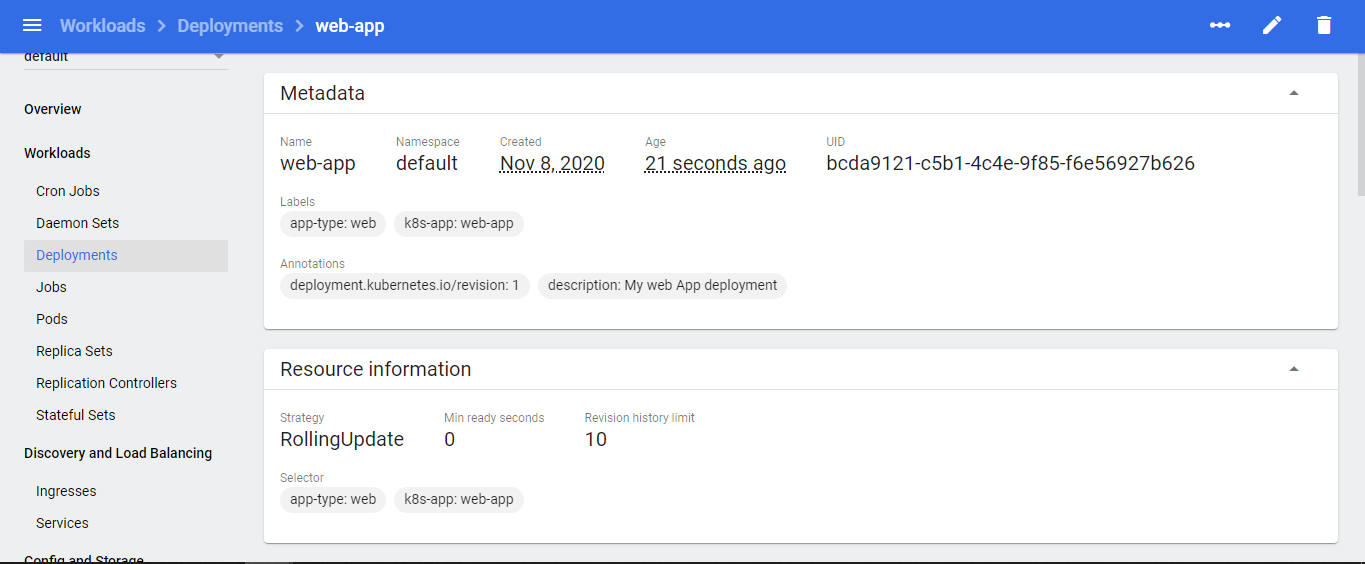
We can check the details related to our deployment:
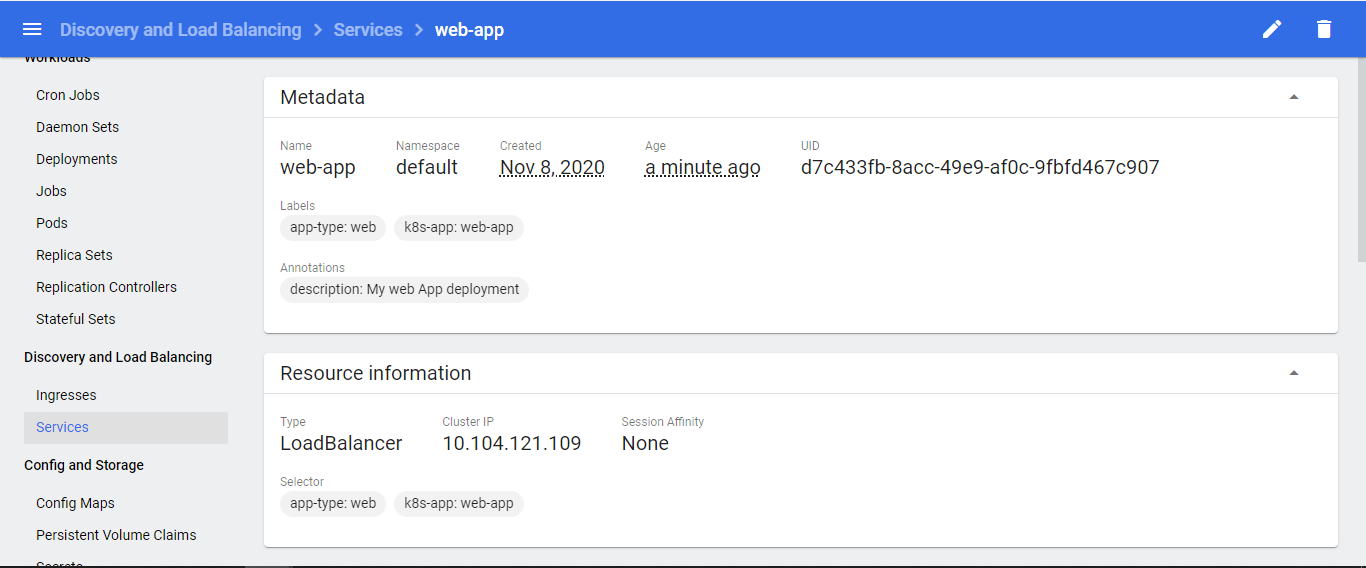
We can also check the details of the service associated to it:
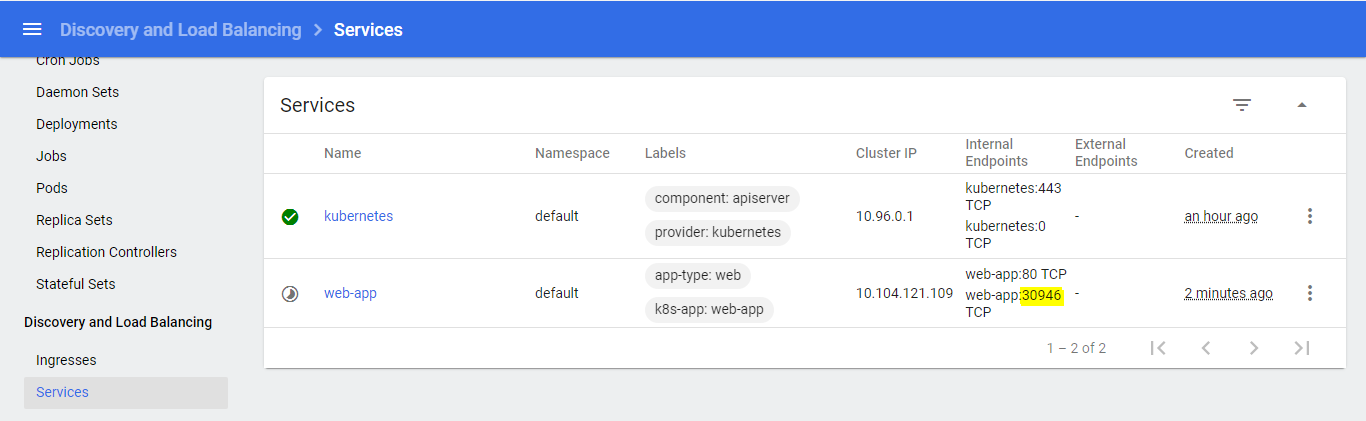
If we check all services, we can find the port our app is deployed on:
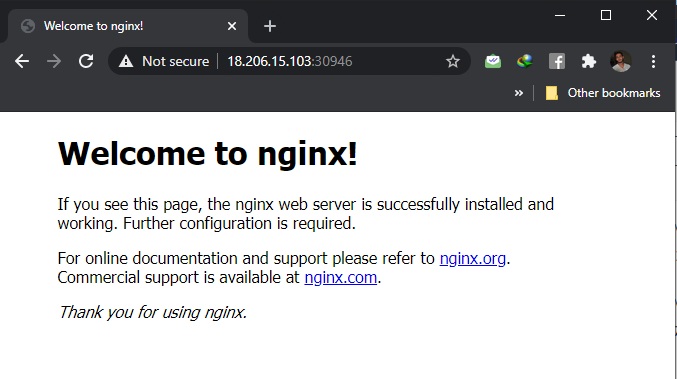
If we check the browser on that port using the master’s IP, we will find our app running there:
Deploying YAML using the Kubernetes Dashboard
Now we will deploy the same app using a YAML file through the Kubernetes dashboard.
We have created the following deployment (you can find the explanation in the previous tutorial)
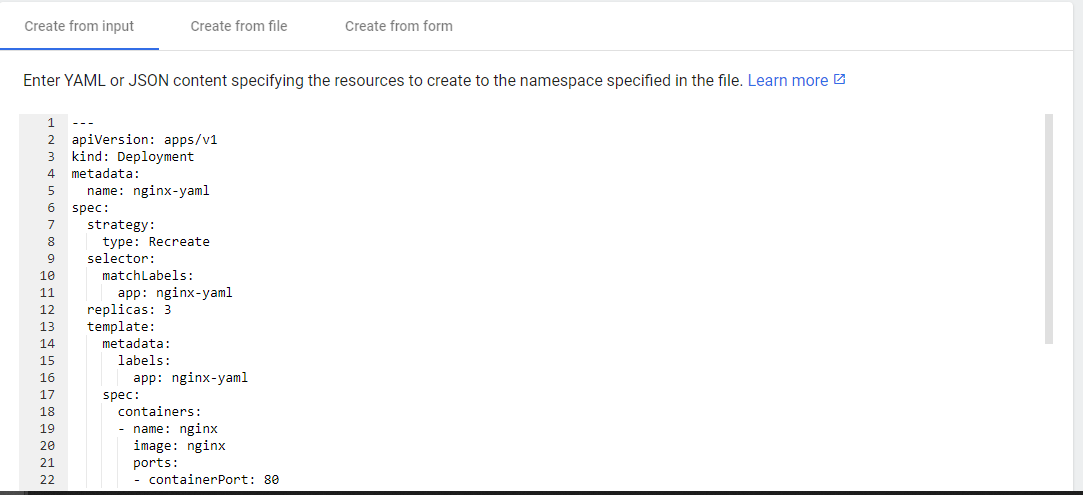
use the following YAML resources while creating a new app using YAML:
---
apiVersion: apps/v1
kind: Deployment
metadata:
  name: nginx-yaml
spec:
  strategy:
    type: Recreate
  selector:
    matchLabels:
      app: nginx-yaml
  replicas: 3
  template:
    metadata:
      labels:
        app: nginx-yaml
    spec:
      containers:
      - name: nginx
        image: nginx
        ports:
        - containerPort: 80

---
apiVersion: v1
kind: Service
metadata:
  name: nginx-svc-yaml
  labels:
    app: nginx
  annotations:
    description: My web App deployment
spec:
  externalTrafficPolicy: Cluster
  ports:
  - name: http
    port: 80
    protocol: TCP
    targetPort: 80
  selector:
    app: nginx-yaml
  type: LoadBalancer
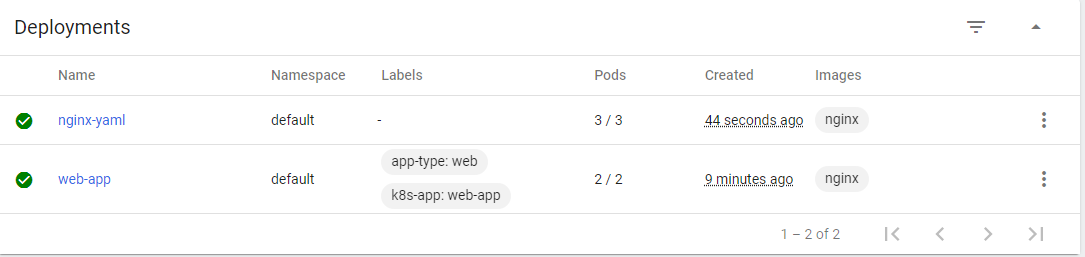
Deploy the app and check the deployments to verify if it was created successfully:
Check the services overview to find on which port the app runs on:

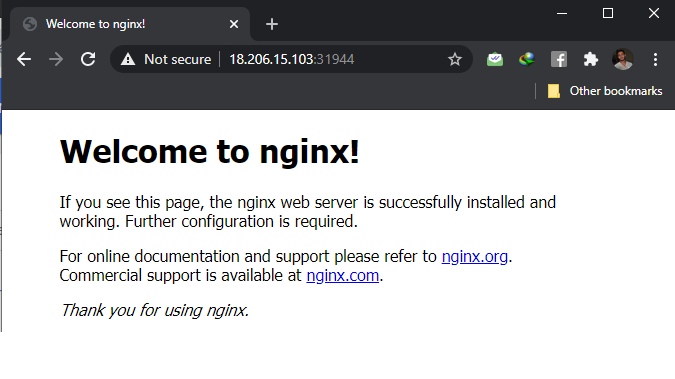
Check the browser on that port using the master’s IP to verify that the app is running successfully:
So,
We have successfully installed the Kubernetes dashboard. We used it to check on service and deployments and then to create some resources using the dashboard’s form and YAML files.