
We’ve talked a lot about what is docker, in the previous article, and why you should consider using it in your project. We will now get our hands dirty with some practical exercises that will help you getting started with Docker.
How do you get docker?
You can install docker your machine through the official documentation: docker supports Linux, Windows and even macOS.
I will be using docker on Ubuntu 18.04 so I will use the universal script given by docker to install the last version of docker on any Linux distribution.
$ curl -fsSL https://get.docker.com -o get-docker.sh
$ sudo sh get-docker.sh
But If you want custom install or a specific version, you must follow the long installation process.
Once Docker is installed:
You can try running the hello-world image by docker to check if everything went well:
$ docker run hello-world
You may get an error like this:

This means that docker is trying to access socket which your user is not allowed to.
To solve this, you only need to add your user to the docker group so it can execute docker as non-root user, then restart your system:
$ sudo usermod -aG docker $USER
$ sudo reboot
You may also encounter this error when docker isn’t running or enabled on system boot:

To solve this, you only need to enable docker on system start up and start its service:
$ sudo systemctl enable docker
$ sudo systemctl start docker
If you’re using a docker from a machine that is working behind a proxy, you should add that proxy to the docker service:
-
- For windows: you can add it from the UI interface for docker Desktop.
- For Linux: you need to create a folder for docker service in the “systemd” folder and then create “http-proxy.conf” file in where you add your proxy, then reload the daemon and docker service.
$ sudo mkdir -p /etc/systemd/system/docker.service.d

$ cat << EOF | sudo tee /etc/systemd/system/docker.service.d/http-proxy.conf
[Service]
Environment="HTTP_PROXY=http://proxy-1:port" "HTTPS_PROXY=https://proxy-2:port/" "NO_PROXY=localhost,add-1,add-2"
EOF

$ sudo systemctl daemon-reload
$ sudo systemctl restart docker
If everything is good, you should get the following output when running the hello-world image:
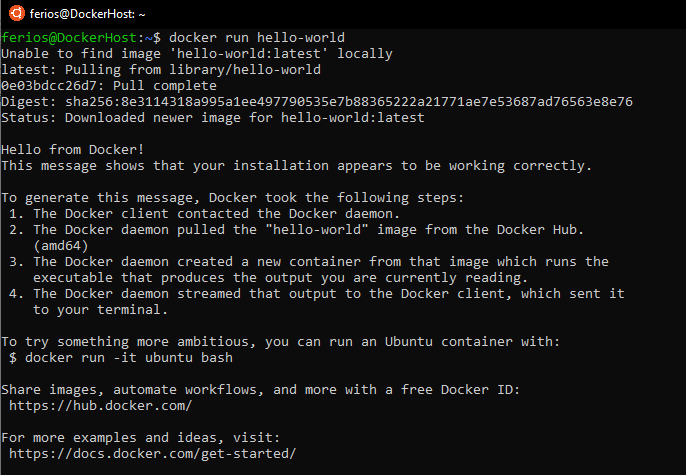
Now we are ready to get started with docker!
Finding the right docker image:
Before using docker containers, you need to choose the right image to use. In order to find the image that you seek, there are three ways:
- Finding the image in Docker hub website.
- Searching the image from docker CLI.
- Building your own custom docker image.
1. Finding the image in Docker hub
If you browse this website, you can find all the public images provided by official enterprises and the docker community.
As an example, we will search for the docker image for Nginx:
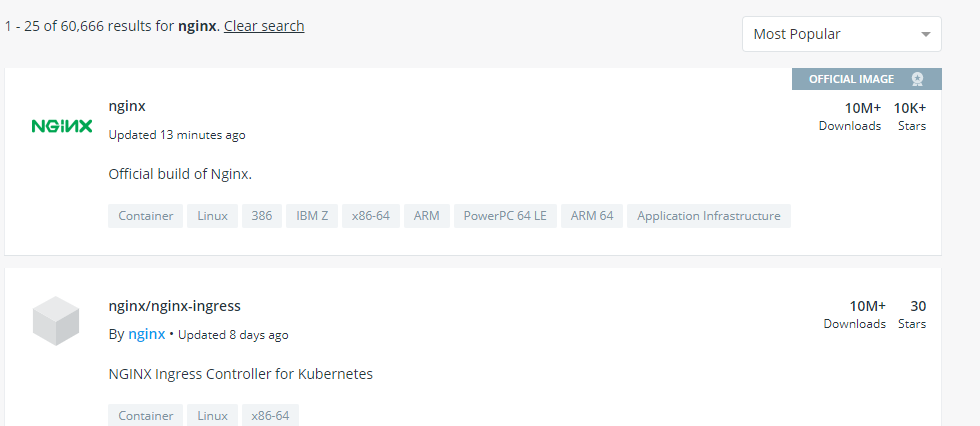
After clicking on the image that you want, can find a whole specification about the image:

So, after finding the right image, you can download it to your machine by using the pull command:
$ docker pull <image_name>
2. Finding the image through docker CLI:
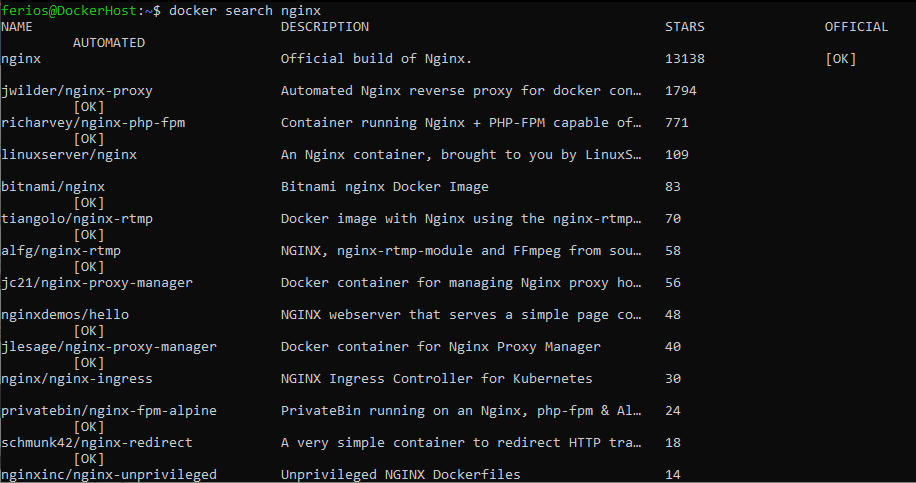
You can use the search command in your terminal to search for images:
$ docker search <image_name>
For example:
Then, you can use the pull command to download the image to your machine.
3. Building your own custom docker image:
If you cannot find the image you need in docker hub, you can build your own image based on existing images through Dockerfiles.
We will explain this process with details in a coming course, this is just a Getting Started with Docker tutorial!
Docker Tags
I’m sure that you’ve seen docker talking about tags in docker hub or anywhere else talking about docker images: Docker tags convey useful information about a specific image version/variant. But if you don’t specify your tag it will be considered as “latest” by default and will use the latest version of the image.
To specify image tag, we will modify the pull image to be like that:
$ docker pull <image_name>:<tag>
If we take a look at Nginx tags:
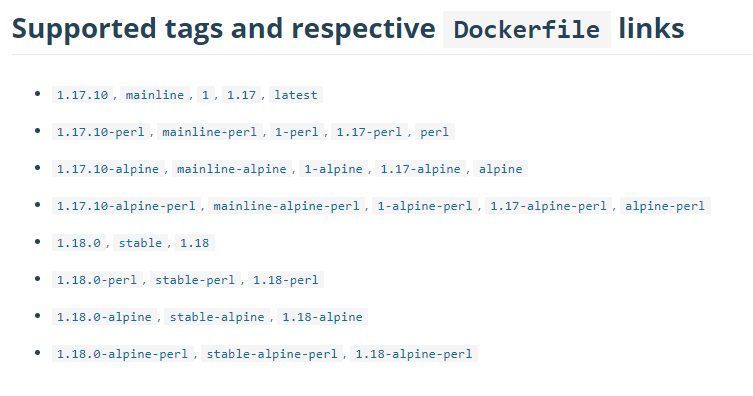
For example, if we want to use Nginx version 1.18, we can simply pull that image:
$ docker pull nginx:1.8
To check all the images in your machine with their correspondent tags, you can simply type:
$ docker images
These are my images as an example:

You can delete an image by using:
$ docker rmi <image_name>:<tag>
Once you find your docker image.
How will you use it?
This is actually simpler than it sounds: the run command by docker can create container from your image based on some specifications entered as arguments:
$ docker run [OPTIONS] IMAGE:TAG [COMMAND] [ARG...]
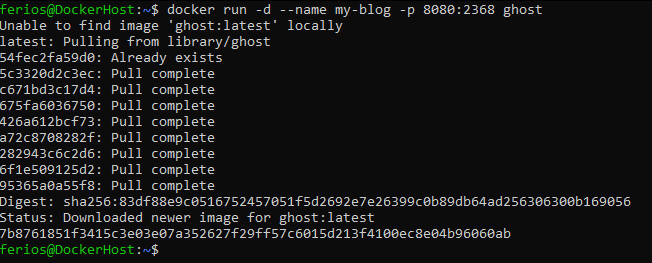
We will take ghost image as an example: it’s a good example for getting started with docker. We will run it in a docker container:
$ docker run -d --name my-blog -p 8080:2368 ghost
By typing this command, we will tell docker:
- To run a new container in the detached mode by using the “-d” flag: this means it will run in the background and will not be attached to the terminal.
- The container will have the name “my-blog” by specifying the “–name” flag, if you don’t do so, it will pick a random weird name.
- Docker will take the default port exposed by the container (which is 2368 by default for ghost) and map it to another specified port which is 8080 in our case through the flag “-p”.
- Docker will use ghost image, since we haven’t specified a tag, it will use the latest
Note that we haven’t pull ghost image: if docker couldn’t find the desired image in your machine, it will pull it automatically from docker hub.
Now let’s create our first docker image:
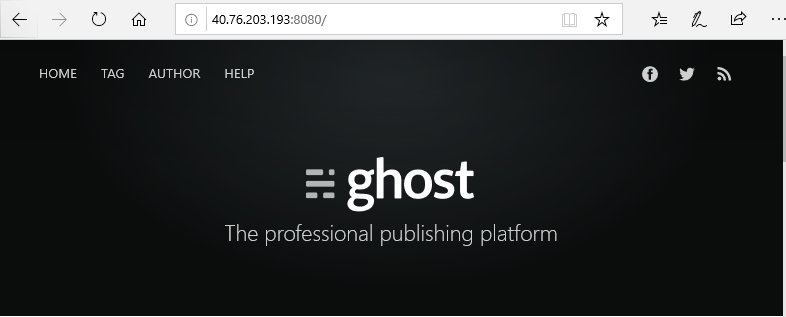
If you check your browser on the url <docker_host_IP>:8080 , you can verify that ghost was deployed successfully:
So, we’ve run our first docker image to get our first running container, now we will move to managing our containers.
To check the running containers in your machine,
You just need to run:
$ docker ps
You can add the flag “-a” to get all the containers no matter was their status:

You can perform different operations to your containers:
# To stop a container
$ docker stop <container[name|id]>

# To start a container
$ docker start <container[name|id]>

# To restart a container
$ docker restart <container[name|id]>

# To remove a stopped container
$ docker rm <container[name|id]>

# To force a running container to be removed
$ docker rm -f <container[name|id]>

# To pause a container
$ docker pause <container[name|id]>

# To resume a paused container
$ docker unpause <container[name|id]>

# To rename a container
$ docker rename <old_name> <new_name>
Troubleshooting docker container:
Once your container is running or maybe stopped working suddenly, there are many ways to show different information about it that can help you to check its internal state or the reason that made it stop running. Here are the main methods that can help you getting started with docker.
The first command is to check logs:
$ docker logs <container[name|id]>
With this command, you can get all the container’s output (stdout + stderr).
It’s important to check logs, because logs never lie.
The second command will allow to get all the detailed information about your container.
$ docker inspect <container[name|id]>
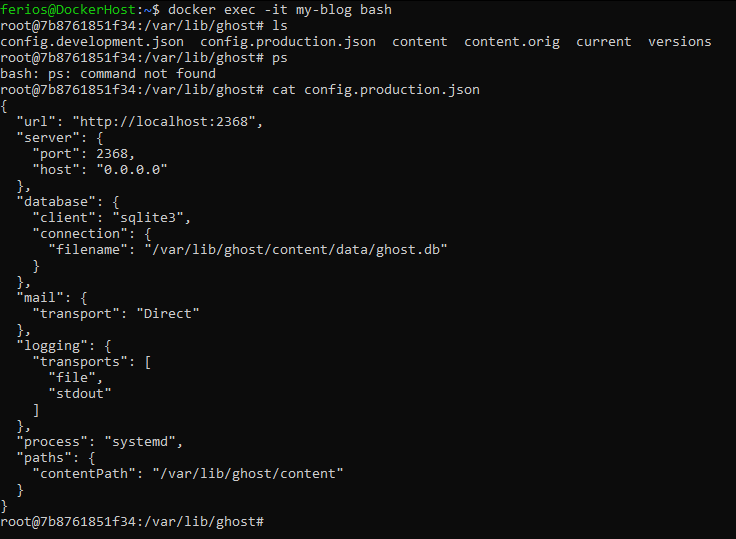
If this is not enough for you, you can actually log in into your container with like-ssh connection and navigate if from the inside. Even that this is not really handy the fact that containers have only few operations to run from the inside, but it can help in some situations:
$ docker exec -it <container_name> <command>
The flag “-i” stand for “–interactive”: your terminal will be kept attached to the operation.
The flag “-t” stands for “–tty”: it will allocate a pseudo TTY for the operation.
Then we have the command: it may differ from a container to another, it can be “bash” or “sh” if you would like to navigate the container, or you use mysql command for the example of a MySQL container.
Let’s try this through our example:
Let’s twist it up to better understand the whole thing!
We will now create two containers that will be connected:
We will first deploy MySQL in docker, after that we will run PHPmyadmin in another container that will be connected to our previously created MySQL!
$ mkdir ~/mydb

$ docker run -d \
    -e MYSQL_ROOT_PASSWORD=password \
    -v ~/mydb:/var/lib/mysql \
    --name mysqlserver \
    mysql
And here we can discover two new parameters:
- The flag “-e” means an environment variable that will be specified while the creation of the container. For the MySQL example, you can find all the variables that you can define in their docker hub page.
- The flag “-v” means “–volume”: here we tell docker to bind the databases’ files inside the container and “mount” them to the specified folder. This is actually a simple example of volumes; we will study them more in a coming course.
So, if we check the “mydb” folder , we can see all the mounted files:

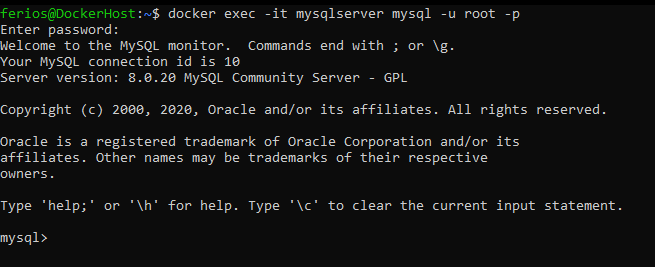
We can also log into the database through the “exec” command:
Now that MySQL is ready, let’s deploy phpMyAdmin!
$ docker run -d --name myadmin \
    --link mysqlserver:db \
    -p 8080:80 phpmyadmin/phpmyadmin
Here, in addition to the parameters that we met before, there’s a new one: the flag “–link” provides access to another container running in the host. In our case the container is the one created in the previous section, called “mysqlserver” and the resource accessed is the MySQL “db”.
We will learn how to customize inter-containers networks in a coming course, this is just a simple implementation for docker networks.
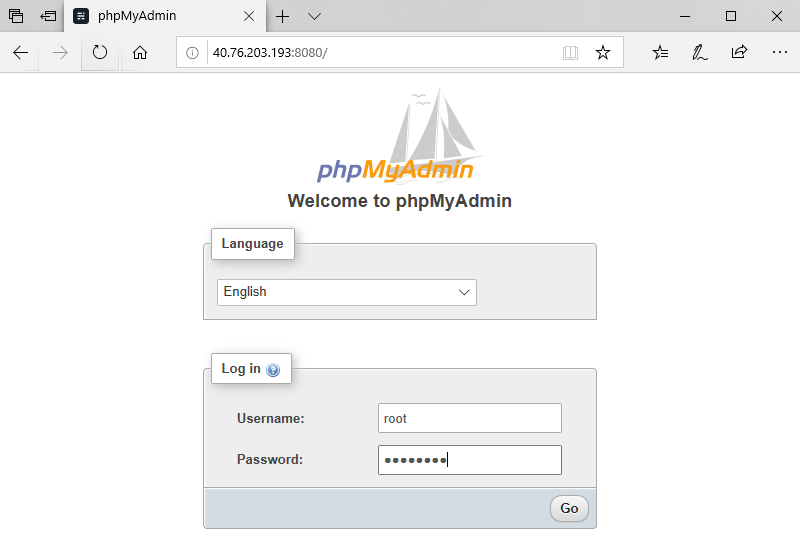
So now, if we check the browser on the port 8080, we can see the page of phpMyAdmin. And we can login using the MySQL password that you set as an environment variable:
As a final trick, you can clean your workshop through this single command:
$ docker rm -f $(docker ps -aq)       # Delete all existing containers
$ docker rmi  $(docker images -q)     # Delete all images
The “-q” flag stands for “–quiet”, it’s used to only display numeric IDs.
So,
We’ve learned through this course how to install docker and set it up.
We’ve also pulled different images and created test containers to perform some basic operations on them.
We took a simple example for docker volumes and networks to connect two containers and persist database data.
This was the beginning for us to explore docker: in the coming courses we will learn how to create our custom docker images with Dockerfiles, and we will also dig deeper in docker volumes and networks.